Showing posts with label Roc Nicholas. Show all posts

Wednesday, 7 September 2016

.....In a while Crocodile

Good morning all!!!

It's a beautiful day here again today, plus it's the 7th of the month which means that it's my turn as Roc Nicholas Design Team to post my work.....

As well as being my DT piece for this month, the postcard will also be sent to another participant in Roc's Rubber Stamp postcard swap group on Facebook this month. There are still a few days to take part...!


I used a 4x6in postcard to create this piece. I mixed black Gesso with Texture Powder to create a black texture paste, then stencilled circles (I'm a teeny weeny bit obsessed with circles) over the background.

Whilst it was drying I stamped out four of my favourite Roc Nicholas stamps (see below) on to good quality stamping paper. As the theme for the swap was 'Black and White with a pop of colour' I didn't have to do much colouring, but I wanted to colour in the gorgeous Alligator.

I'd recently bought Ranger's new 'Enamel Accents' and I love them. They are also great to paint with, just by adding some water to thin them down slightly, and when they're dry, you're left with a beautiful shiny finish - fabby!


When the textured circles were dry, I did some background stamping, then positioned my cut-outs on the card and glued them in place. 

Stamps I used are:
1. Crocodile
2. Leaf dot border
3. Polka dot dog
They can be found at http://www.stampotique.com/stamp/roc-nicholas.html

I'm quite pleased with it. Hope you like it too?!
Happy crafting friends, please pop by and say Hello, I'd love to hear from you xoxoxo


Sunday, 7 August 2016

'Fly Away'...

Fly Away with 'Flying Bird'

Time soon flies when your having fun and it's my turn to be DT for Roc Nicholas design team this month....


This is my make for this month. On the last Stampotique release of stamps I treated myself to several of Roc's new stamps, and one I couldn't resist was 'Flying Bird'. I fell in love with her straight away and it's such a versatile stamp.

I've been really enjoying playing around with textures and effects recently but, unfortunately these photos really don't show the depth, shimmer, brightness of colour and effect I managed to achieve. Sorry, I tried all sorts of angles...

I thought that I'd try and make my own texture paste as I wanted one that would hold its height but also have a rough surface to it so that it would grab hold of any medium and colour I was going to use over the top of it.
I managed to create a very thick, heavy, gritty paste and applied it to this canvas and left to dry.


Once it was dry I sprayed it with various different coloured sprays in bright tones then shimmer sprays.

I stamped out Roc's Flying Bird stamp, with an extra set of wings, and painted it with slightly watered down acrylic paint, until I got the depth of colour I wanted. I kept to the same lemon, blue and pink of the canvas.
 I then painted an opalescent pigment ink over the top of the painted duck. It gave such a lovely effect, and to tye the background in with the stamp, I spritzed the opalescent ink over the textured background.. I'm just gutted it doesn't show on here.

I really enjoyed making this, and as ever using Roc's stamps is a total pleasure.

Thanks for stopping by, please leave me a message to say hi. It's great hearing from you..

All Stampotique stamps are available at www.stampotique.com


Thursday, 7 July 2016

A Close Shave

A Close Shave...


It's my turn for the Roc Nicholas design team today.  

I decided to make a journal page this time, as I haven't made a journal page for a while and I really enjoy them.
There is a reason why I decided to call this piece "A Close Shave" and the reason is because I used shaving foam and acrylic inks swirled together to make the background. Your not only able to create beautifully different pages every time, but the paper smells divine too ;-)

I used a lot of Roc's new stamps for this page, as well as some of her other stamps. All of which can be found right here along with all her other wonderful designs for Stampotqiue Originals.

Please leave a message to say 'hi', I'd love to hear from you.

Hope you have a lovely day. Gemma xx

Friday, 8 April 2016

It's a dogs life

Today is my day to be Roc's featured Design Team Member!

For this months piece, I decided to make a small canvas using 'Polka dot dog and Daisyhead' stamps by Roc Nicholas and Stampotique.  You can find Rocs stamps here...


UnfortunateLy, the camera hasn't picked up the vibrancy of the colours on this little canvas. I used acrylic pains and markers in very bright colours on the black gesso'd background.

I got the idea for the background on this canvas from a class I did with the very talented Karen Hayselden at 'Art from the Heart' a few months ago. Thanks Kassa X

I gesso'd the canvas with black gesso and left it to dry. To create the gorgeous multi-coloured background, I used acrylic paints and pieces of card to create the multi-coloured 'prints' I used to apply to my canvas using the techniques taught to me by Karen.  

To enhance the colours, I used some of Tim Holtz Distress Crayons and rubbed them over a few of the colours.
To give the background more depth, I used a couple of different coloured acrylic marker pens to flick the ink onto the canvas making splatter marks.  You can also achieve this effect by adding some water to paint and flicking it with a paintbrush.  It's great fun, and very messy. I also used white paint to  make circles to make the colours POP off the canvas......


I used a couple of my favourite stamps for this make. 'Polka dot dog' is so incredibly cute. I just love him, he's adorable! I also used the flower from Roc's 'Daisyhead' stamp. This stamp is fabulous and so versatile, I use it such a lot.
Because the background is so bright and busy, I decided to stamp my dogs onto book paper to act as a contrast and make the dogs stand out more. I decided to lightly colour one of the dogs, but to be honest, I prefer the plain one as it's brighter.


I stamped out the flower from 'Daisyhead' a few times onto one of the pieces of card I used earlier when making the background 'paint print'. If you know me, you won't be surprised to see that I chose a card which was mainly turquoise - it's getting a bit obsessive..! Lol 
I stamped out four flowers and layered them up and shaped the petals, as I wanted to create more dimension. I then glued it to the top corner.....


I really enjoyed making this little canvas as I got to use my favourite colours and some of my favourite stamps. I hope you like this. 

Thanks for popping over to my blog. I'd love you to leave a message to say hi...

Happy Crafting Xoxoxo 


Monday, 7 March 2016

Monster Madness

My Monster Mash-up


Good morning lovelies.......

It's my turn to make something for Roc Nicholas' Design Team today, I always look forward to this....

I decided to make a tag (size 12), using a selection of Roc's stamps, which you can find here


I began by colouring the tag using various colours of Tim Holtz Distress Inks using a round blending tool. I just love how the colours blend so well together.  I added some translucent texture paste onto the tag, then to add some more depth I used some white texture paste too.
When everything was dry, I used some background stamps and stamped in similar colours, just to create some interest.

This tag was made because I truly couldn't decide which of Roc's stamps to use; so I cut several of them out and coloured them in using the Distress inks and a waterbrush.


 I arranged the pieces together on my craft mat and took a photo of the layout once I was happy with it, so I didn't forget how I wanted it - my memory is awful!!!

 
 Once everything was coloured in I started sticking it to my tag. Once the glue was dry, I drew around the outline of my monster using a permanent black pen.


The stamps I have used are: 

Roc Nicholas:
and 
Jo Capper-Sandon

 I hope you have enjoyed my tag today. Please, leave a message and say 'hi', I'd love to hear from you.............

Happy crafting xoxoxox

Gemma xxxx mwah


Sunday, 7 February 2016

Spread the Love

Happy Valentines Day my Lovelies......


Hi everyone, it's my time to share my work with you for Roc Nicholas' Design Team this month...


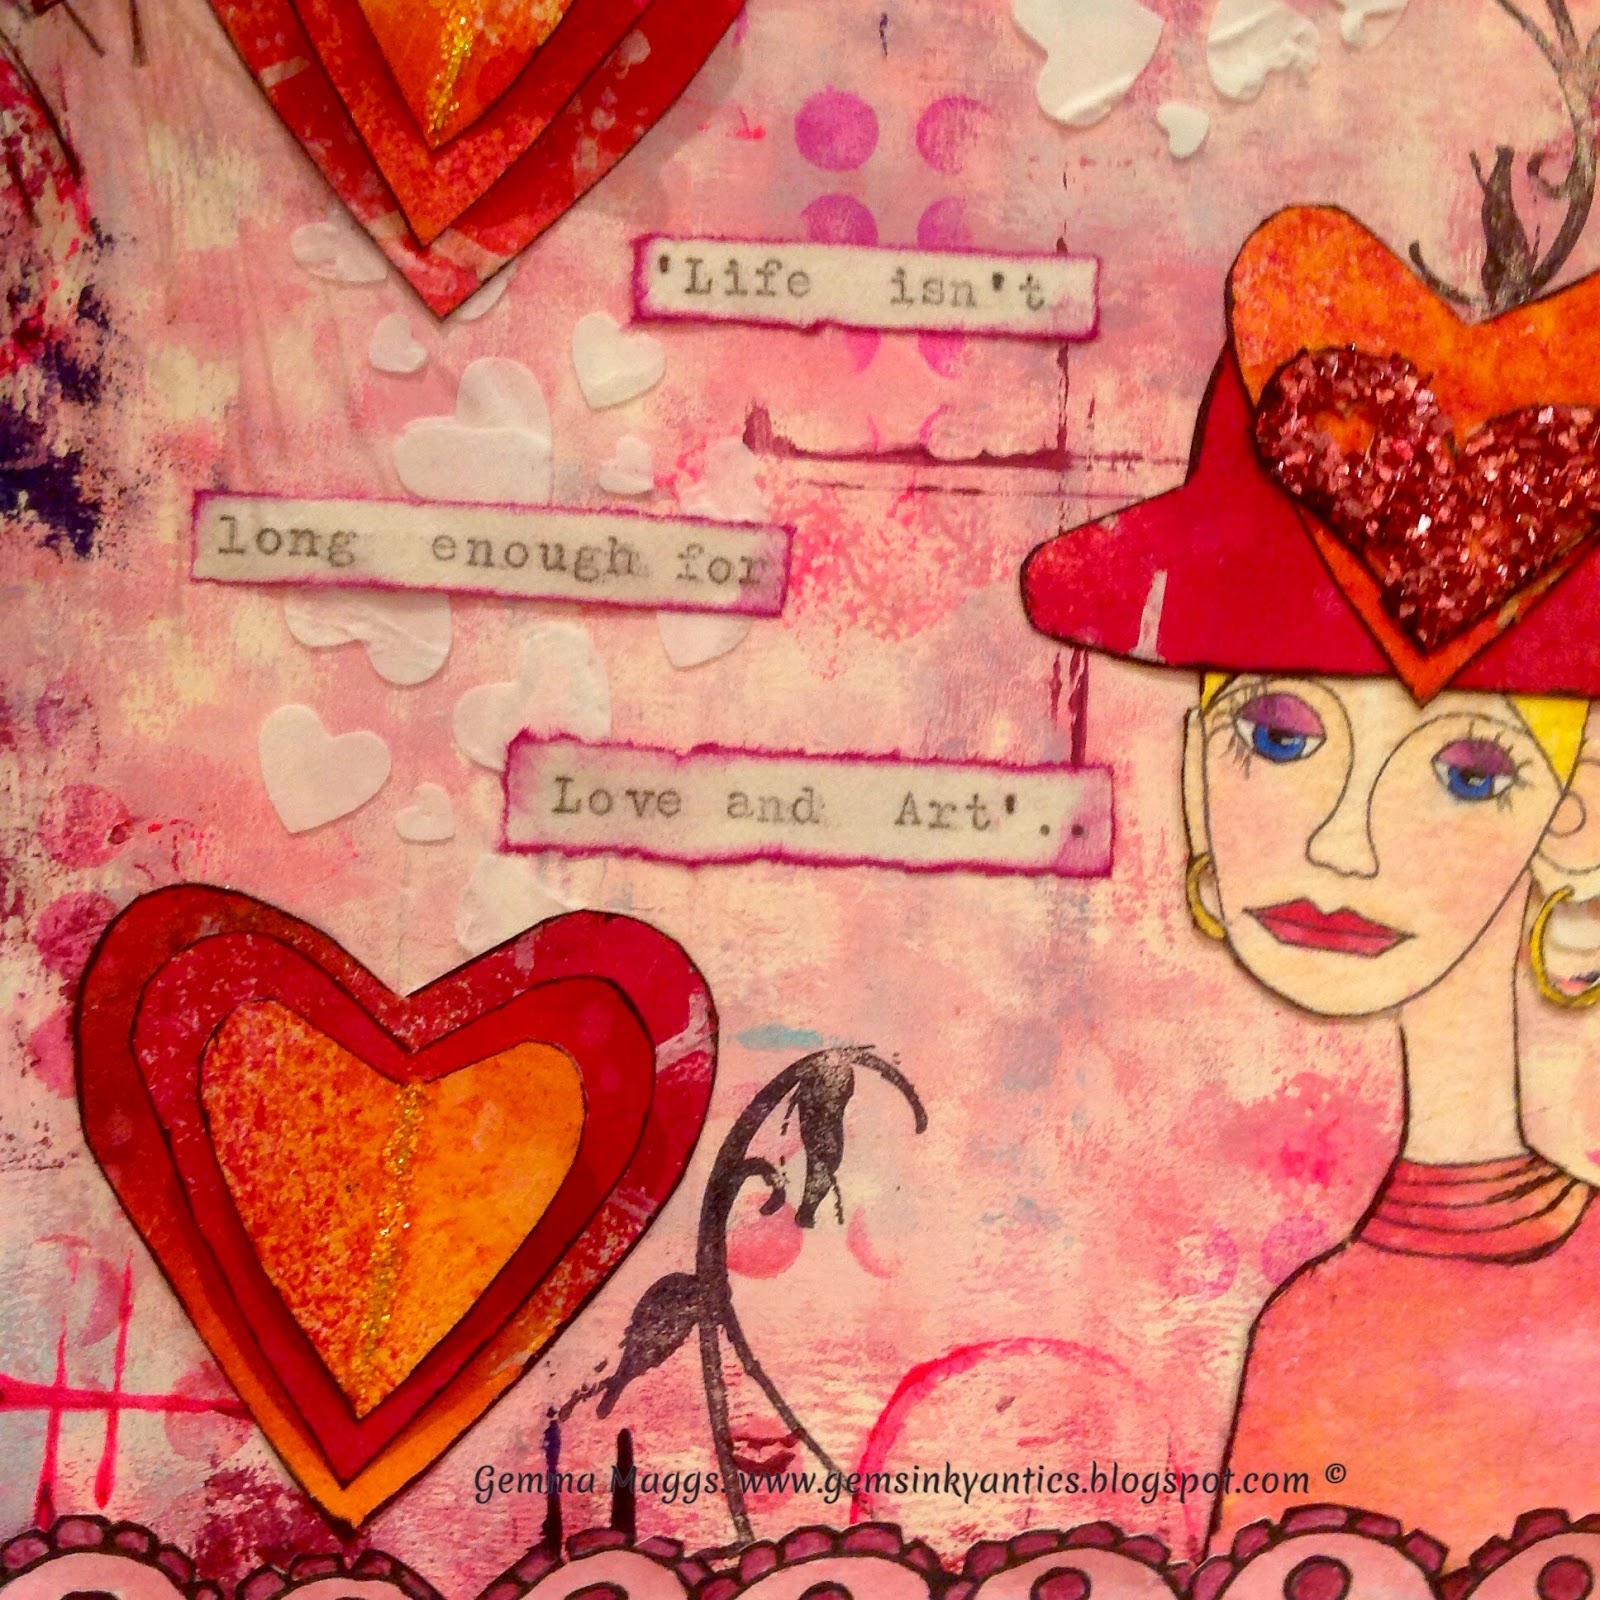
As Valentines Day is quickly approaching and love is in the air, I thought I'd take my opportunity to use various shades of pink to make a 'loved up' journal page. Not that I ever do need an excuse to use pink!

I began by brayering a background onto a journal page, then stencilled some texture paste through a heart shaped stencil,  to add some more interest.


I also added some background stamps in a complimentary colour and added some black to make the page 'pop'...

I took a spare piece of card and used some spray inks to create a background, again using similar colours, as I wanted to cut out some heart shapes.
I coloured in an image of Roc's 'Daisy head' stamp and the 'Scallop lace border' stamp using a mix of watercolour paint, watercolour crayons and some pastel pencils.


I used some of the hearts to make a new 'hat' for 'Daisyhead', and with the others I see them to make a dimensional feature on the page.   

I found a quote which I thought was pretty apt for this page, it says "Life isn't long enough for love and art!"

I hope you like this page, and if so please leave me a message...  Thanks for looking everyone xoxo


Monday, 7 December 2015

Xmas With Roc Nicholas

Xmas With Friends


Hello my lovelies, I hope you are all happy and crafting away like little crafty beavers and getting into the Christmas spirit.....

What can I say?  I absolutely love Christmas!!  It is such a special time of year for me.  It's the time to spend with my family, friends and loved ones; creating our own special memories.

I was really looking forward to making my piece for Roc Nicholas' DT this month. I had an idea in my head as to what I wanted to do, but it was getting it from my head that was the problem lolol


 I really wanted to make something 3D and substantial for this project, something you can use for home decor when decorating your home for the holidays......

I began with the word Xmas in MDF, painted it red, then painted over with a lighter colour.  When the paint was dry, I coated the entire word in DecoArt Crackle Glaze and left it overnight to dry .
It's so exciting to go back and look at your project to find out how well it has crackled.  Luckily for me this time, it worked really well - it doesn't usually for me!!!!


 I spent a few hours colouring these lovely little characters in by Roc Nicholas for Stampotique.  I used Faber Castell's Polychromos and Caran D'Ache's Pablo pencils, which are my go to pencils every time - I love them....


 I stamped 'Roc's Tree' onto some Acetate because I wanted to emboss it, and I was really pleased with how it turned out. You can see it on the photo above.


I love being able to chop and change images to make them into whole new characters.
Ive done this a couple of times on this project.  

You can see above that I have used the body of 'Reindeer' by Magda Polakow, but have replaced the head with Roc's Angel by Roc Nicholas.

Below i have used the body of 'Global Warming?' by Daniel Torrente and Jill Penney , but replaced the snowman's head with the face of  'Bird Lady' by Roc Nicholas....
I have also given them all either Christmas hats or reindeer antlers from Magda Polakow's 'Reindeer' and 'Agatha Christmas' Stamps, to give them all more of a festive feel..!


 To add some finishing touches, I used some items that I've gathered over the years for making Christmas themed projects for homes.  Here i used some reindeer moss, with some glittered snowflakes, artificial snow flecks and embossed stars.  You can't really see on the photos, but i have added quite a lot of glittery sparkles to all of the gorgeous little characters.  You can't have to many twinkles in my opinion...........


The stamps I used in this piece were:   * Roc's Tree,
                                                               * Ponytail
                                                               * Feline 
                                                               * Bird Lady 
                                                               * Roc's Angel
                                                               * Horse
                                                               * Screaming Bunny
                                                               * Snowman
                                                               * Reindeer
 
If you want to see all of Roc Nicholas' stamps, you can find them here. 

If you would like to visit Stampotique, just press here
I really hope that you have all enjoyed my Christmassy themed project.  I had so much fun making it!

Please leave a comment to say 'hello', I would love to hear from you.

Merry Christmas to all of you, I hope you all have a fabulously festive and memorable time and I will see you in the New Year......xoxoxoxo

Saturday, 10 October 2015

My Exciting Announcement...!

Well, the time has finally come when I can tell you all my fabulous secret...!


Its been so difficult keeping this quiet for about a week as I've been bursting at the seams to tell everyone.  
It's been so exciting for me and i hope that you can follow me on this great journey I'll be going on....

OK, here it is..I'm so very pleased to announce that i have been chosen to be on the fabulous ROC NICHOLAS Design Team.....

Yaaaaaaaaaaaaaay, I've told you all, it's out in the open and i cant wait to start my exciting new challenge in November!!
I have loved Stampotique stamps for years and Roc's stamps are amazing and so versatile.  I  just love using them.

I entered three projects for Roc's DT application and although i left it quite late to apply, i had so much fun playing with Roc's stamps..........

Here are some photo's of my makes...:-

First ----


Second-------------


Third--------


I cant wait to find out where this amazing opportunity takes me with Roc's stamps and the lovely ladies on her Design Team.  

I really hope you can join me on my journey............ 

Thanks for looking, Love Gemma  xoxoxox