
I'm so happy...! Christmas has come early, Yaaaaaaay!
I've been lucky enough to be asked to make some fabulous kits up by Roy Pakeman, owner of Candy Box Crafts to appear on Hochanda Craft Channel, eeeek so exciting!!
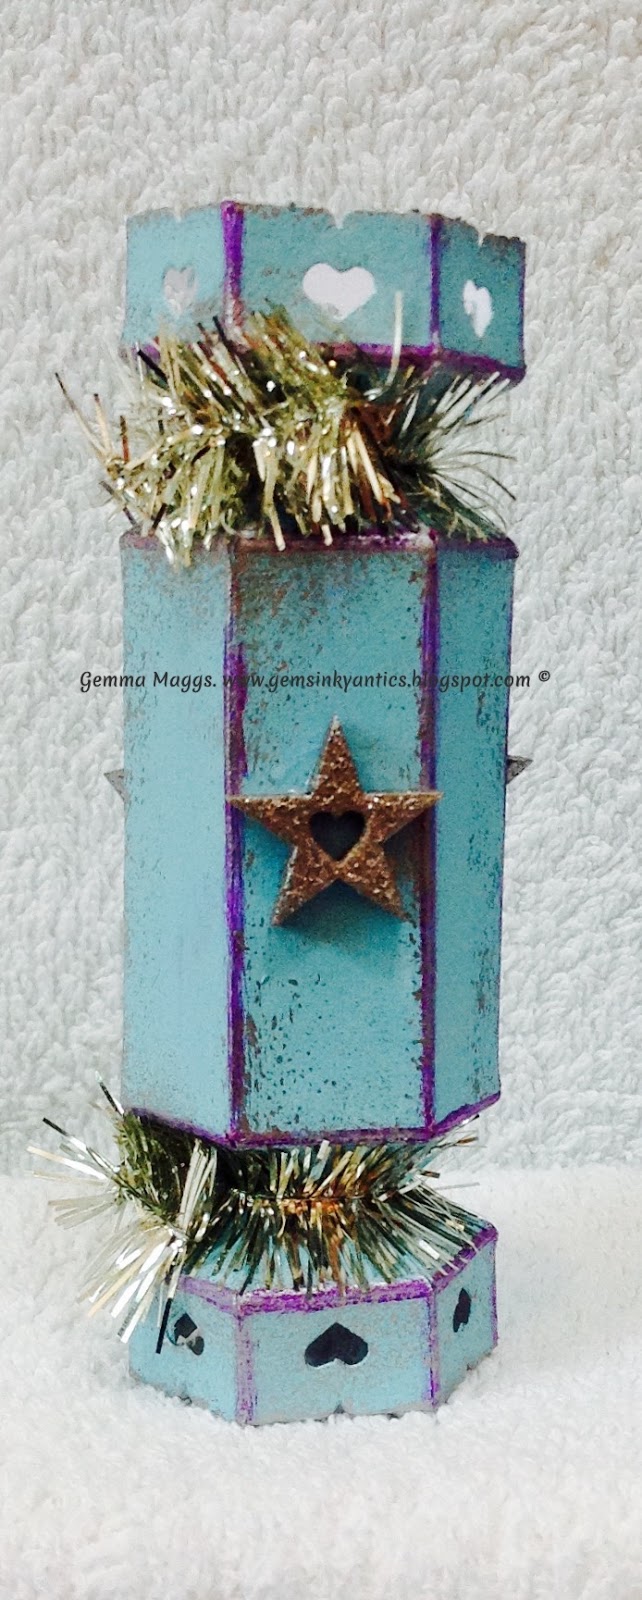
The first kit I've chosen to decorate is the beautiful 'Tall gift box'. It's such a versatile kit. You could make it into so many different things. It doesn't have to be a gift box, it could be a storage box, or a statement piece, a secret keeper, or even a vase for dried flowers?!

To start decorating this kit, I Gesso'd both sides of each piece. This is just to prime it and stop the paint being absorb into to the wood, you also get a truer colour.
I had an idea in my head as to what I wanted it to look like, a cold, winter, snowy scene, so I just had to choose my colours. I decided to use Tim Holtz Distress paints as they cover very well, are quite a liquid paint and the colours are amazing!
To achieve my wintery effect, I wanted cold colours so I chose a few shades of blue/turquoise and a couple of lilac/purple.
I used my brayer to apply the paint, as I wanted a more layered effect to the surface of the wood. I started with a layer of 'titan buff' (Amsterdam paint) which is a lovely cream colour and as a base, easily helps the other colours blend together well.
I started with the lightest blue first, and layered every piece with the same colour, in sort of a conveyor belt system, then when that side was dry I started again, with the same colour on the other sides. It worked quite well, because by the time you'd finished the last piece, the first one was dry - perfect!
Then just repeat each layer with the next colour, going slightly darker with each layer, but
use the darker colours sparingly. I used the purples as the last layers. Then simply used an old bottle lid and store card to paint on circle and lines in the darker of the colours, they stand out so well. You could use any stamp as a background stamp.

Once the embossing has cooled, it's then time to glue the box together.
To do this, I began with the long sides and the smaller square (nothe the base piece). Personally, I love 'Cosmic Shimmer' glue, it dries quickly and is strong, but any wet glue should work.
Apply a thin layer of glue to the tab at the bottom of the long side, then along the indents to ensure its glued securely. Do this with each side remembering to glue the sides too.


Once everything has been glued together, leave it to dry completely.
Whilst it was drying I chose one of Tim Holtz Ideology Christmas Tree's , as I wanted to use it in the hole in the lid. I wouldn't use it as a handle though as I don't think it would be quite strong enough.
Before I attached it to the lid, I applied a few blobs of glue, here and there, then dipped it into some artificial snow, adding a star to the top to finish it off. Then glued it in place.
By this point the glue had completely dried and the box was very solid, so now I could glue it to the base, knowing it wouldn't collapse in my hands! Haha! The last things I added were 'Let it Snow' embellishments that I bought from Hobbycraft. I attached 1 to opposite sides and then some snow around the edge of the lid. All finished!!!


I really would recommend them to everyone.
Hope you like my gift box, please leave a message if you do, I'd love to hear from you.
Happy crafting xoxo


No comments:
Post a Comment